|
||
         |
Advanced 3D Aircraft Texture Mapping
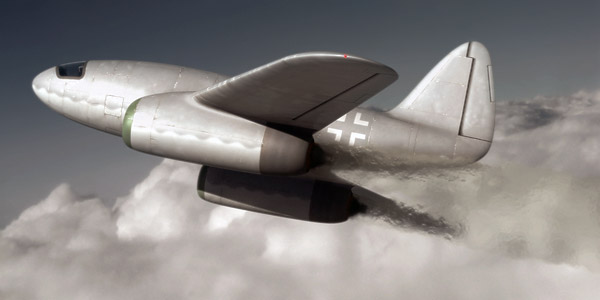
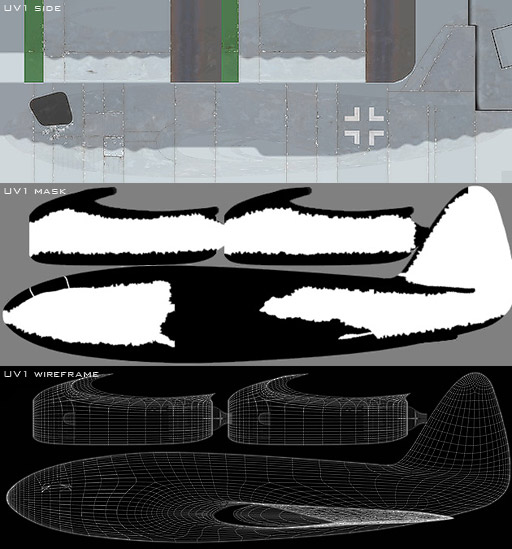
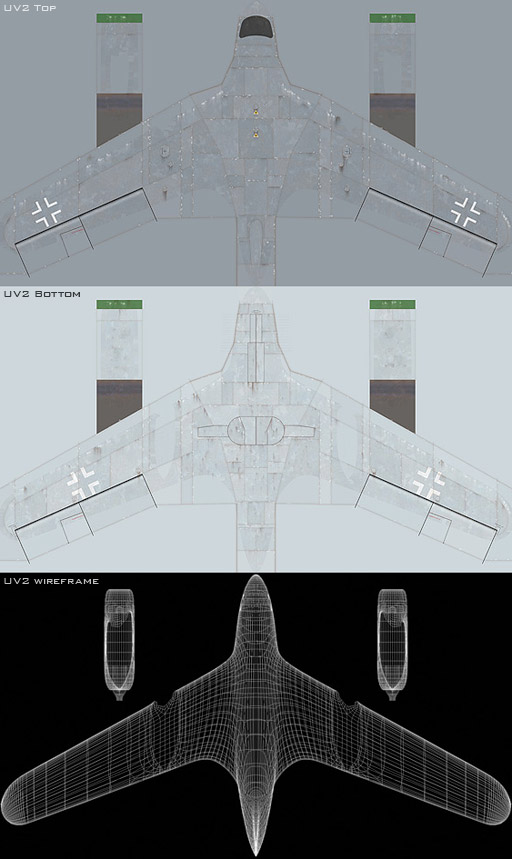
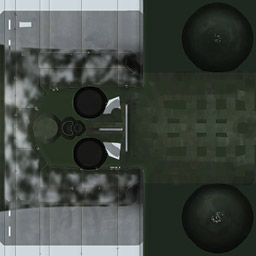
You might have read my Basic 3D Aircraft Texture Mapping tutorial already, but there are better ways of texture mapping aircraft models. Lets explore a couple of techniques. 1 - The Easy Way: planar mapping & mixing UV channels This technique uses mainly planar mapping for the entire object. One set of mapping coordinates (UV channel 1) from the side, and one set from the top (UV2). These two textures are then merged with the used of a greyscale mask. In MAX a typical material setup for an aircraft could be a Top/Bottom material using Local Coordinates (in case your plane attempts a looping you don't want the textures to flip! ). Each sub material uses a Mix Map for diffuse/specular/bump/etc mapping. The first map in a Mix Map is the sideview (UV Channel 1). The second map is the top or bottom view (UV Channel 2). The third map is the mask, whereby areas that should receive the sideview texture is painted white and other areas black (unused areas can be painted grey for clarity). The sideview of course has a left and right side. This can be achieved by making it a Composite Map in MAX. If you've mapped the side from the left, your first map should be the right side texture (set to tile and "Show Map on Back" turned on = default). Then the second map (which will be composited on top of the first) is the left side texture and it should have tiling disabled and "Show Map on Back" turned off too. Below are the (diffuse) textures used on the aircraft shown in the title image.
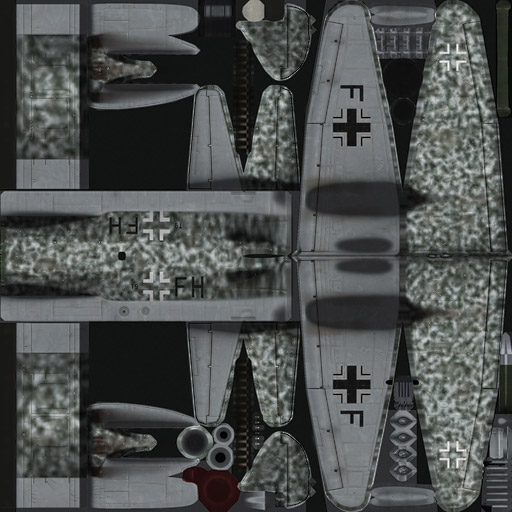
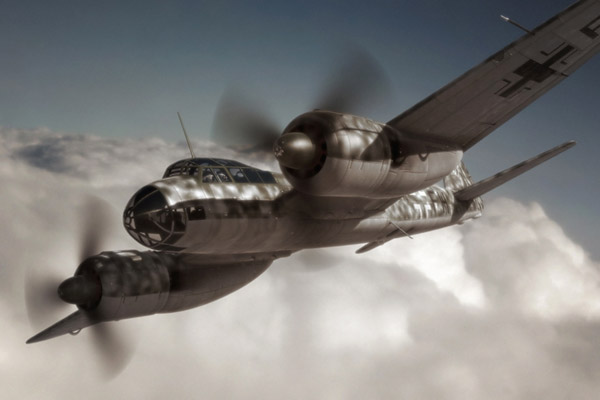
2 - The Hard Way: proper unwrapping The second technique is pretty much the same way as it is done for low-poly models as used in computer games. The model is broken up in small parts which can be mapped seperately and arranged in a square. It helps if you already plan ahead your low-poly mesh before adding Meshsmooth (= MAX subdivision) and give each seperate part a different material ID. This saves time breaking up the model for unwrapping, as you can simply select by ID rather than hand-select hundreds of polygons. A way to speed up unwrapping is a technique whereby the mesh broken up in small bits, then animated into a flat square which can be mapped planarly. To do this, go into polygon subobject mode and you detach (to element) your mesh into small parts, which can be mapped planarly. Then turn on the animate button, move the slider to 100 and move and rotate all bits to fit in a square area. When all parts are arranged, add a UV Map modifier and make sure to set both width and height to the same value (the biggest one of the default setting - so the model will be mapped with a 1:1 aspect ratio). When this is done, add a Unwrap UVW modifier. Next cut this modifier (right-click, Cut), then delete the UV Map modifier, set the animation slider back to 0 and paste the Unwrap UV modifier on op of your Editable Poly object in the modifier stack. Collapse the stack back to Editable Poly or Mesh. Now your UVs should be fixed in place. You can check this by adding an Unwrap UV modifier again and opening the Edit window. If you've done it right, your UV layout should be the same as the animated mesh layout you made earlier. Don't forget to weld all broken vertices again to restore all seams you introduced when detaching the model into small parts. This technique was used on my Junkers Ju 88 model. I didn't want to have a texture size bigger than 2048x2048 (as this eventually grinds Photoshop to a halt on a low-spec computer) and because of the complexity of the model I needed to map the nose seperately (1024x1024) to have enough texture resolution in the cockpit area, in case I needed to add a squadron badge and such. The nose area then received its own material ID in a multi-subobject material so it could have the second texture map.
What technique is better? You might wonder now what technique is better. There is no clear answer, it all depends on your model, its purpose, and the time you have to make it. I will try to explain you the benefits and drawbacks of each technique: Technique 1 - Benefits * Easy mapping Unwrapping is kept to an absolute minimum and requires little skill. You just have to be careful with areas that "fold back on itself" such as airscoops. Also, if you have engine nacelles you may have to break them off and map them on a different location in your UV layout. In the case above, you notice that the wing overlaps the rear fuselage. This is wrong of course, and in a later stage the wing was detached in UV1 and moved into one corner so it wouldn't receive the fuselage mapping. But that's about all unwrapping you will have to do. Other than that it's simple planar mapping. * Smaller texture sizes Since you're using MAX materials anyway, texture resolution doesn't matter and you can optimise the textures to the shape of your model. This way you can keep each texture relatively small compared to when you would unwrap the entire model on one sheet. Smaller textures are of course much more pleasant to edit in Photoshop. * No hard seams By having waved, blurry or speckly edges on your mask, you can prevent seams on your texture really easily. Top/bottom and side views will blend in perfectly and make a neat skin for your mesh. If you keep the length of your top/bottom and side view textures equal, it's also really easy to match up panel lines and such. Also you can generate your right view from your left vuew, and your bottom view will have a lot in common with your top view. So creating your textures is quite a bit easier too. Technique 1 - Drawbacks * Lots of textures! In case of a very complcated model, you can end up with many textures. In case of my Mustang, I wanted a high texture resolution, but not the burden of big textures. So I spit up my model in quite a few (too many!) different textures: fuselage_top fuselage_left fuselage_right fuselage_bottom wing_top wing_bottom wing_front tailplane_top tailplane_bottom tailplane_front ...and of each one a diffuse, specular and bump variant. As you can understand, the material structure got kinda complicated in the end, with lots of Composite and Mix Maps. With the example above I was able to keep it much simpler. Top, bottom, left, right (which I never bothered making in the end! ). Many textures can be a pain when you want to change something, such as the positioning of a marking that goes across the fuselage. This can easily mean you have to edit 12 textures to adjust one item on it. * Complex material setup As mentioned above, material structures can get a bit complicated this way. This also means that MAX has a harder time calculating the materials, which can make rendertimes longer. Technique 2 - Benefits * Simple material setup If you manage to map everything onto one page, it's really easy to set up your material. All you need it one Bitmap and no hassle with Mix Maps and Composite Maps. This also improves rendertimes. * Fewer textures to edit. If you manage to unwrap everything to one texture, you will have an absolute minimum of textures to edit. Quite convenient when you want to make many variations of your model (different camouflages etc...). * Stretchless. You can unwrap your model in such a way, that there's no noticeable stretching. With Technique 1 stretching will be limited too, however, never exceeding 45 degrees if you do it properly. * Trouble-free export & real-time use Having unwrapped your model properly means that applications that don't support MAX materials can still display your model properly. So you can export your model to a different application and the materials will be preserved. This will allow your model to be exported to Shockwave 3D, for example, so you can view it in real-time 3D. There are several examples of this on my website. Technique 2 - Drawbacks * Tricky & tedious unwrapping For many the unwrapping process is a complicated one, and for all it's elaborate. It simply takes time to align everything the way you want it. And mistakes are easily made if you lose track of where everything goes. It's also more complicated to edit the texture once it's unwrapped, as all parts have to meet up in the end. This brings us to... * Lots of seams! Breaking up your model creates countless seams which have to be cleverly edited on your texture in order to not show up. Here texture baking can be a great help. Imagine having a Tiger Meet F-16 to texture... matching up all the tiger stripes with this technique can be a nightmare. The best option is to make a new, planar, mapping set for this (UV2) and bake it to your unwrapped texture (UV1). But this is a completely different story altogether! * Big textures/low texture resolution! For me, the main problem with this technique is the huge texture sizes required to keep a decent resolution for your model - if you unwrap to one single texture that is. Anything over 2048x2048 will really make Photoshop struggle unless you have a super PC. The mentioned resolution is rarely sufficient for mapping an entire aircraft. One solution to this is to scale down unimportant parts and thus free up space for more important parts. For example the bottom of a tailplane will rarely be viewed up-close and can be scaled down, allowing the textures of the nose and cockpit area to be bigger to add detail which will show in close ups. But having parts at different scales also brings trouble: seams will be harder to hide and panel line thickness will vary, which might become noticeable if you're not careful. Conclusion? Personally I seem to be using these two techniques in alternating fashion. Whatever I fancy at a given time! Once I've done a proper unwrap I've become tired of the large texture sizes and poor texture resolution. So I switch back to the first technique. But then I get annoyed by the many different textures I need to edit in order to make changes. Not very pleasant when having to do many different variations of the same texture as well! However, unless you're modelling for real-time use (dictating technique 2), there is no reason to stick to one technique. In fact, I have found out that combining both techniques works well too. The Me P 1070 uses both mixmaps, but also is unwrapped semi-properly. This way I've managed to keep both texture sizes and quantities to decent levels, without sacrificing quality. At the same time unwrapping was kept to a healthy minimum, speeding up the process dramatically. The best of both, so to say. But it also means the worst of both. The material setup is not suited for export to real-time engines, for example. Additionally I still have to deal with texture seams here and there - tough very few! The ideal solution? I guess that depends on your personal wishes. If you have a super fast computer that can deal with 10,000x10,000 textures easily in Photoshop, use technique 2 for versatility and ease of texture/material management. But if that's not the case, your time is limited, and real-time use is not required, definitely go for technique 1. For variety's sake, I personally just keep alternating these techniques on a per-project basis! :) Well, I hope this "mini-guide" was of some use to those who struggle with texture mapping their aircraft models! Happy texturing! Ronnie Olsthoorn |
|